






Biology experiments in class do not need an expensive lab. Five easy, fun ones: extracting DNA from strawberries, a photosynthesis experiment with leaf discs, osmosis with an egg or a potato, looking at cells with a phone, and seed germination with a soil moisture sensor. All are safe with adult supervision and link directly to textbook topics.
Much of biology is invisible: the cell, DNA, photosynthesis. That is why experiments are so powerful here. When students pull white strands of DNA out of a strawberry with their own hands, or watch a leaf disc float up in the light, an abstract idea becomes real.
Each experiment has a materials list, steps, the science, and safety rules, followed by ideas for turning it into a STEAM project.
Biology experiments at a glance: age and time needed
| Experiment | Age | Time | What it teaches |
|---|---|---|---|
| Strawberry DNA | 10+ | 30 min | Cells, membranes, DNA |
| Leaf discs | 11+ | 40 min | Photosynthesis, oxygen |
| Osmosis with egg or potato | 9+ | 2–3 days / 1 hour | Osmosis, membranes |
| Phone microscope | 8+ | 30 min | Cell structure |
| Seeds and a sensor | 9+ | 1–2 weeks | Germination, data |
For every experiment: adult supervision, taste nothing, wash hands afterwards. Alcohol is highly flammable: no open flames, lit candles or gas stove in the room, close the bottle straight after use, and only an adult pours it. Cutting with knives is an adult job. Wash hands with soap after handling raw eggs. Use only plants for DNA extraction.
Experiment 1: strawberry DNA extraction
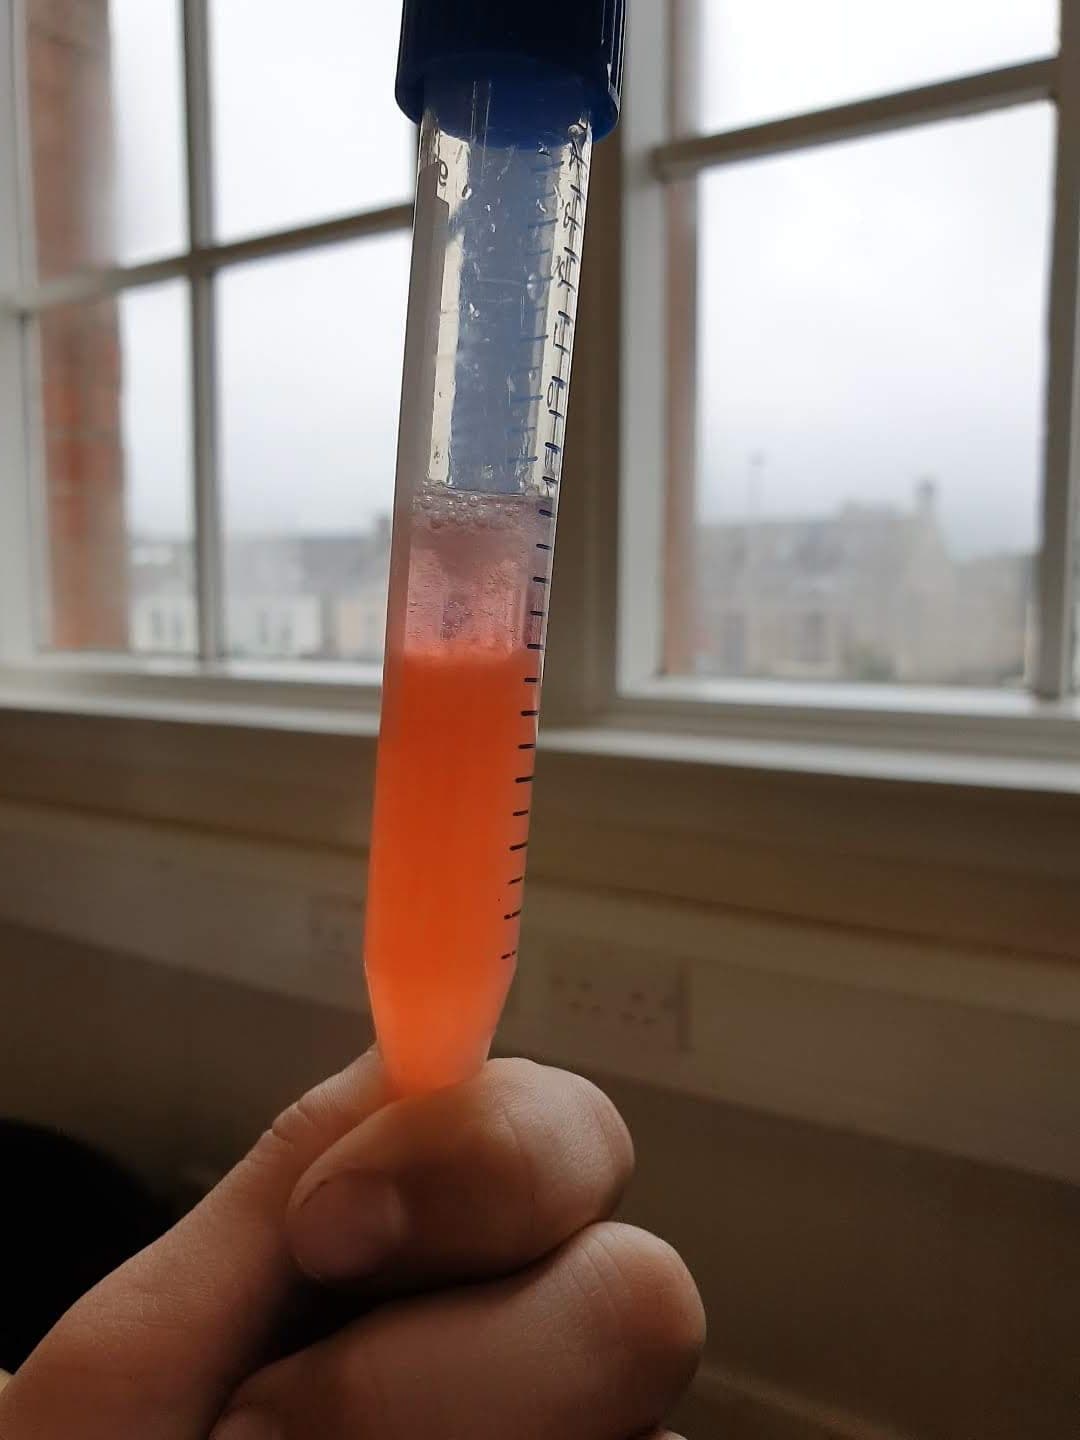
Materials: 2–3 strawberries, a zip-lock bag, 100 ml of water, 1 teaspoon of salt, 2 teaspoons of washing-up liquid, a coffee filter or gauze, a clear narrow glass, ice-cold rubbing or surgical alcohol (70–96%), a wooden skewer.
Steps:
- Make the extraction solution: stir the water, salt and washing-up liquid gently, without foam.
- Put the strawberries in the bag, add 3 tablespoons of solution and mash by hand for 2 minutes.
- Filter into the glass, filling it about a quarter.
- Very slowly pour the same volume of cold alcohol down the side of the glass so it forms a layer on top.
- Within 1–2 minutes white strands appear at the boundary: these are clumps of countless DNA molecules. Wind them gently onto the skewer.
What happens and why: mashing breaks up the tissue and separates the cells. The soap breaks down the cell membrane and the nuclear envelope, which are made of fat-like substances (lipids), releasing the DNA. Salt neutralises the negative charge of the DNA molecules and helps them clump together. DNA does not dissolve in alcohol, so it comes out as strands at the boundary. Strawberries work well because they are soft and octoploid: their cells carry eight sets of chromosomes (human cells have two), so there is a lot of DNA.
Safety: alcohol is flammable and not for drinking: keep any flame away. Never use human, pet or insect tissue for DNA extraction.
Experiment 2: a leaf disc photosynthesis experiment
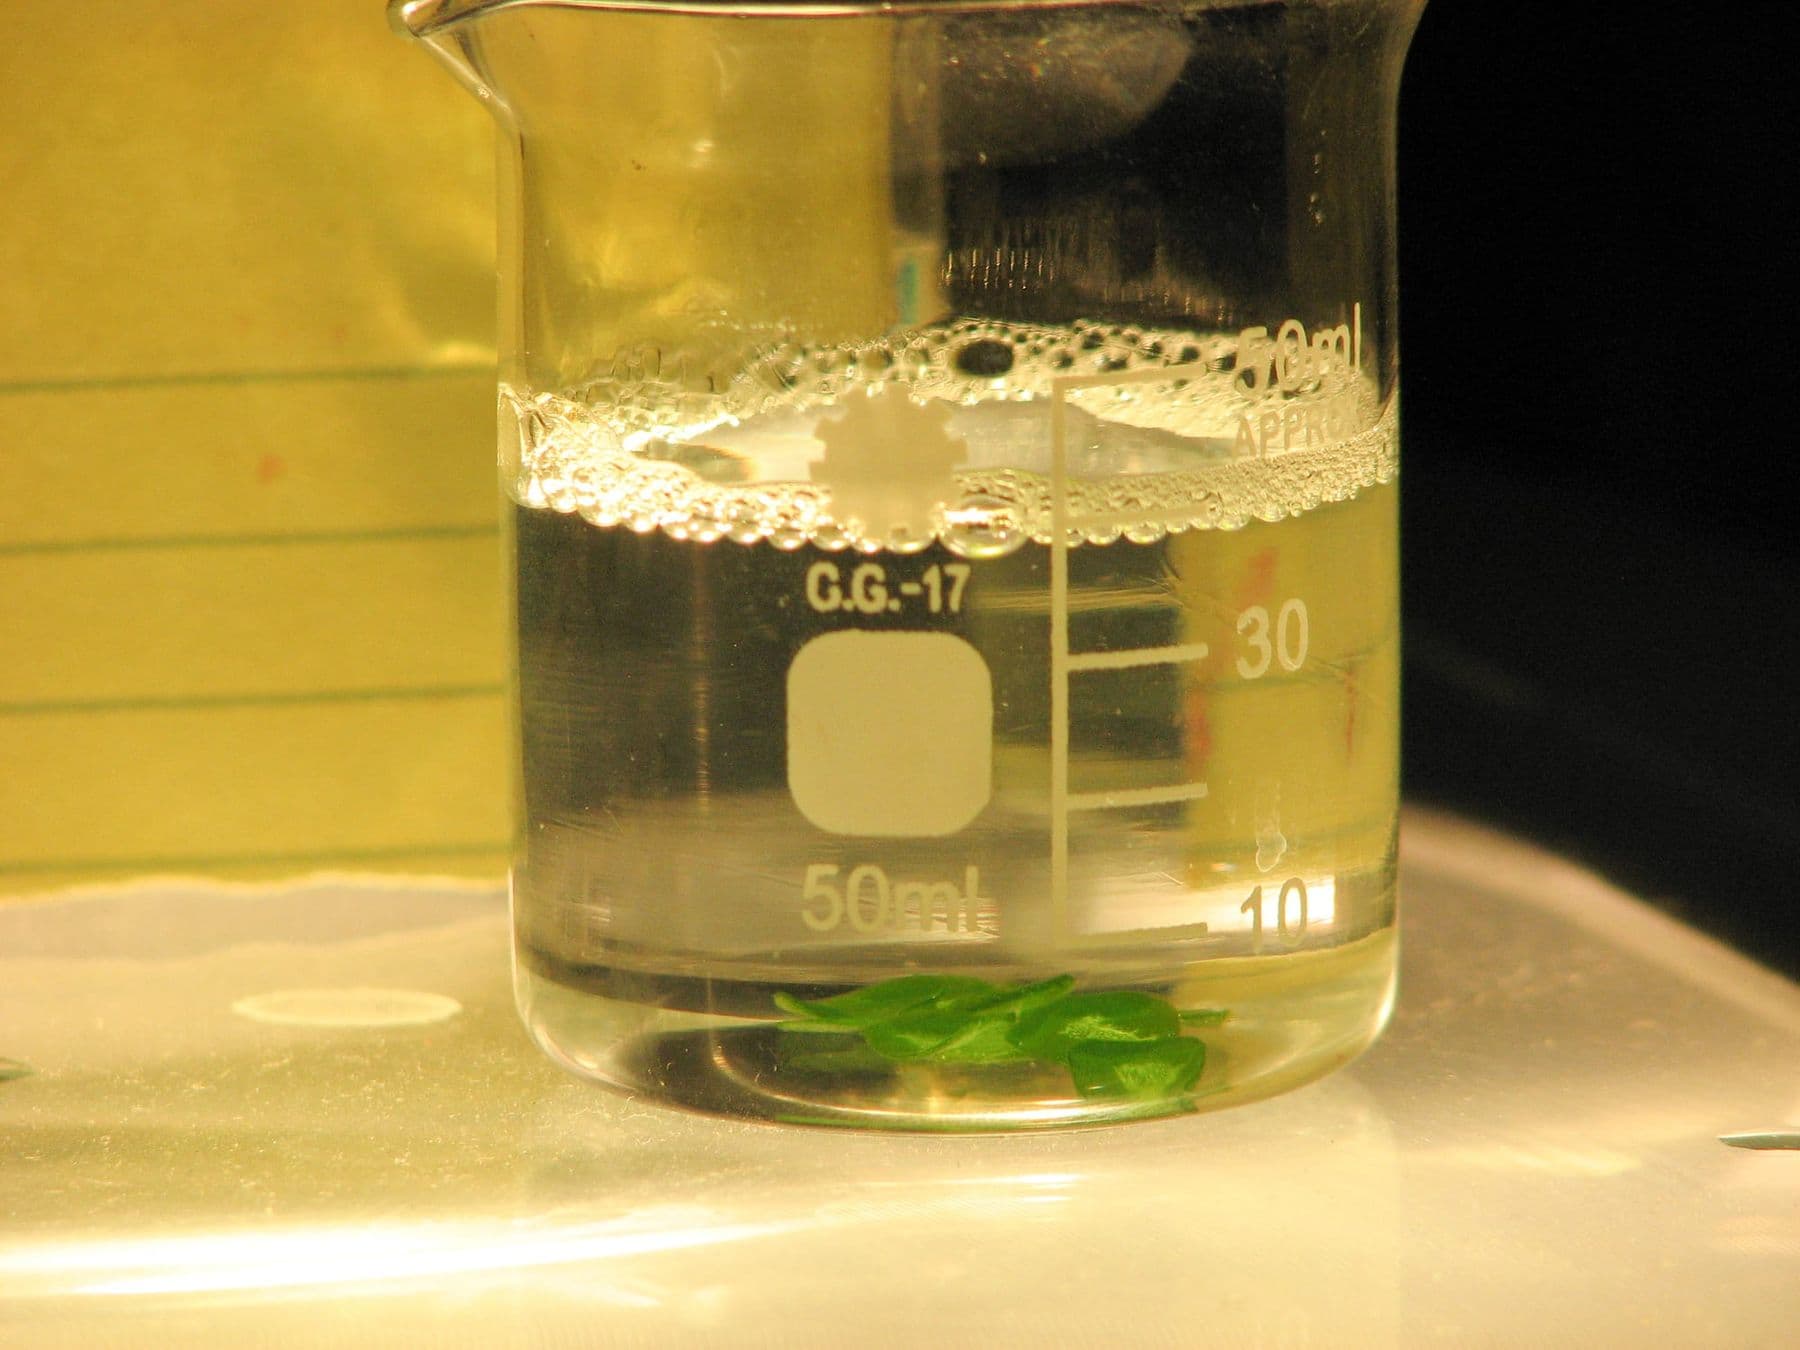
Materials: spinach or another soft leaf, a wide straw or a paper hole punch, a 10 ml needle-free syringe, 300 ml of water, 1/8 teaspoon of baking soda, one drop of washing-up liquid, 2 clear cups, a desk lamp, a box for darkness.
Steps:
- Dissolve the baking soda in the water and add one drop of washing-up liquid.
- Cut 10 discs from the leaf, avoiding the thick veins.
- Take out the plunger, put the discs in the syringe, replace the plunger, draw in 5 ml of solution and push out the air.
- Block the tip with a finger and pull the plunger back for 10 seconds. Repeat 2–3 times (no more than 5, or the discs get damaged) until the discs sink.
- Move the discs into a cup of solution under the lamp. Put the second cup in a box in the dark.
- Every minute, count how many discs have floated up.
What happens and why: the syringe vacuum pulls air out of the leaf’s internal spaces, the solution takes its place and the discs sink. The drop of soap helps the solution get past the leaf’s waxy surface. In light the leaf photosynthesises: it uses carbon dioxide from the baking soda solution and releases oxygen. The oxygen collects inside the leaf and the disc floats. In the dark the discs stay at the bottom: that is your control group.
Extension: put the lamp at different distances (10, 20, 30 cm) and compare how long it takes for half the discs to float. Royal Society of Biology teaching notes point out that light intensity falls with the square of the distance, and that a lamp also warms the water, which affects the result separately. So an LED lamp, which stays cooler, is better.
Experiment 3: osmosis with an egg or a potato
Option A, the shell-less egg: put a raw egg in a glass of table vinegar for 24–48 hours (change the vinegar after a day). The shell is made of calcium carbonate: it reacts with the acetic acid and dissolves, giving off bubbles of carbon dioxide. What is left is the egg in a thin membrane. Prepare two eggs this way. Rinse them gently, weigh them, and put one egg in water and another in very sweet syrup or salty water. Weigh again after 24 hours.
Option B, potato sticks: an adult cuts 6 equal potato sticks. Weigh them; put three in plain water and three in salty water (1 tablespoon per 200 ml). After 30–60 minutes, pat them dry and weigh again. Calculate the percentage change in mass.
What happens and why: the egg membrane and potato cell membranes are selectively permeable: water passes through, dissolved substances much less. In osmosis, water moves towards the side with the higher concentration of dissolved substances. So the egg in water swells and gets heavier, while the one in syrup shrinks. The potato stays firm in water but turns soft and bendy in salty water: its cells have lost water.
Safety: a shell-less egg bursts easily, so work over a sink. Wash hands after handling raw egg. The egg is not for eating afterwards.
Experiment 4: cells through a phone camera
Materials: a phone, a school microscope or a clip-on macro lens, an onion, a glass slide, a cover slip, water, tweezers.
Steps:
- Peel a very thin, transparent layer of skin from the inside of an onion layer with tweezers.
- Spread it on the slide in a drop of water and gently lower a cover slip on top.
- With a microscope, hold the phone camera to the eyepiece and slowly find a sharp image. A macro lens is too weak for cells, but leaf veins, salt crystals and fabric fibres show up well with it.
- Take a photo and label what you see.
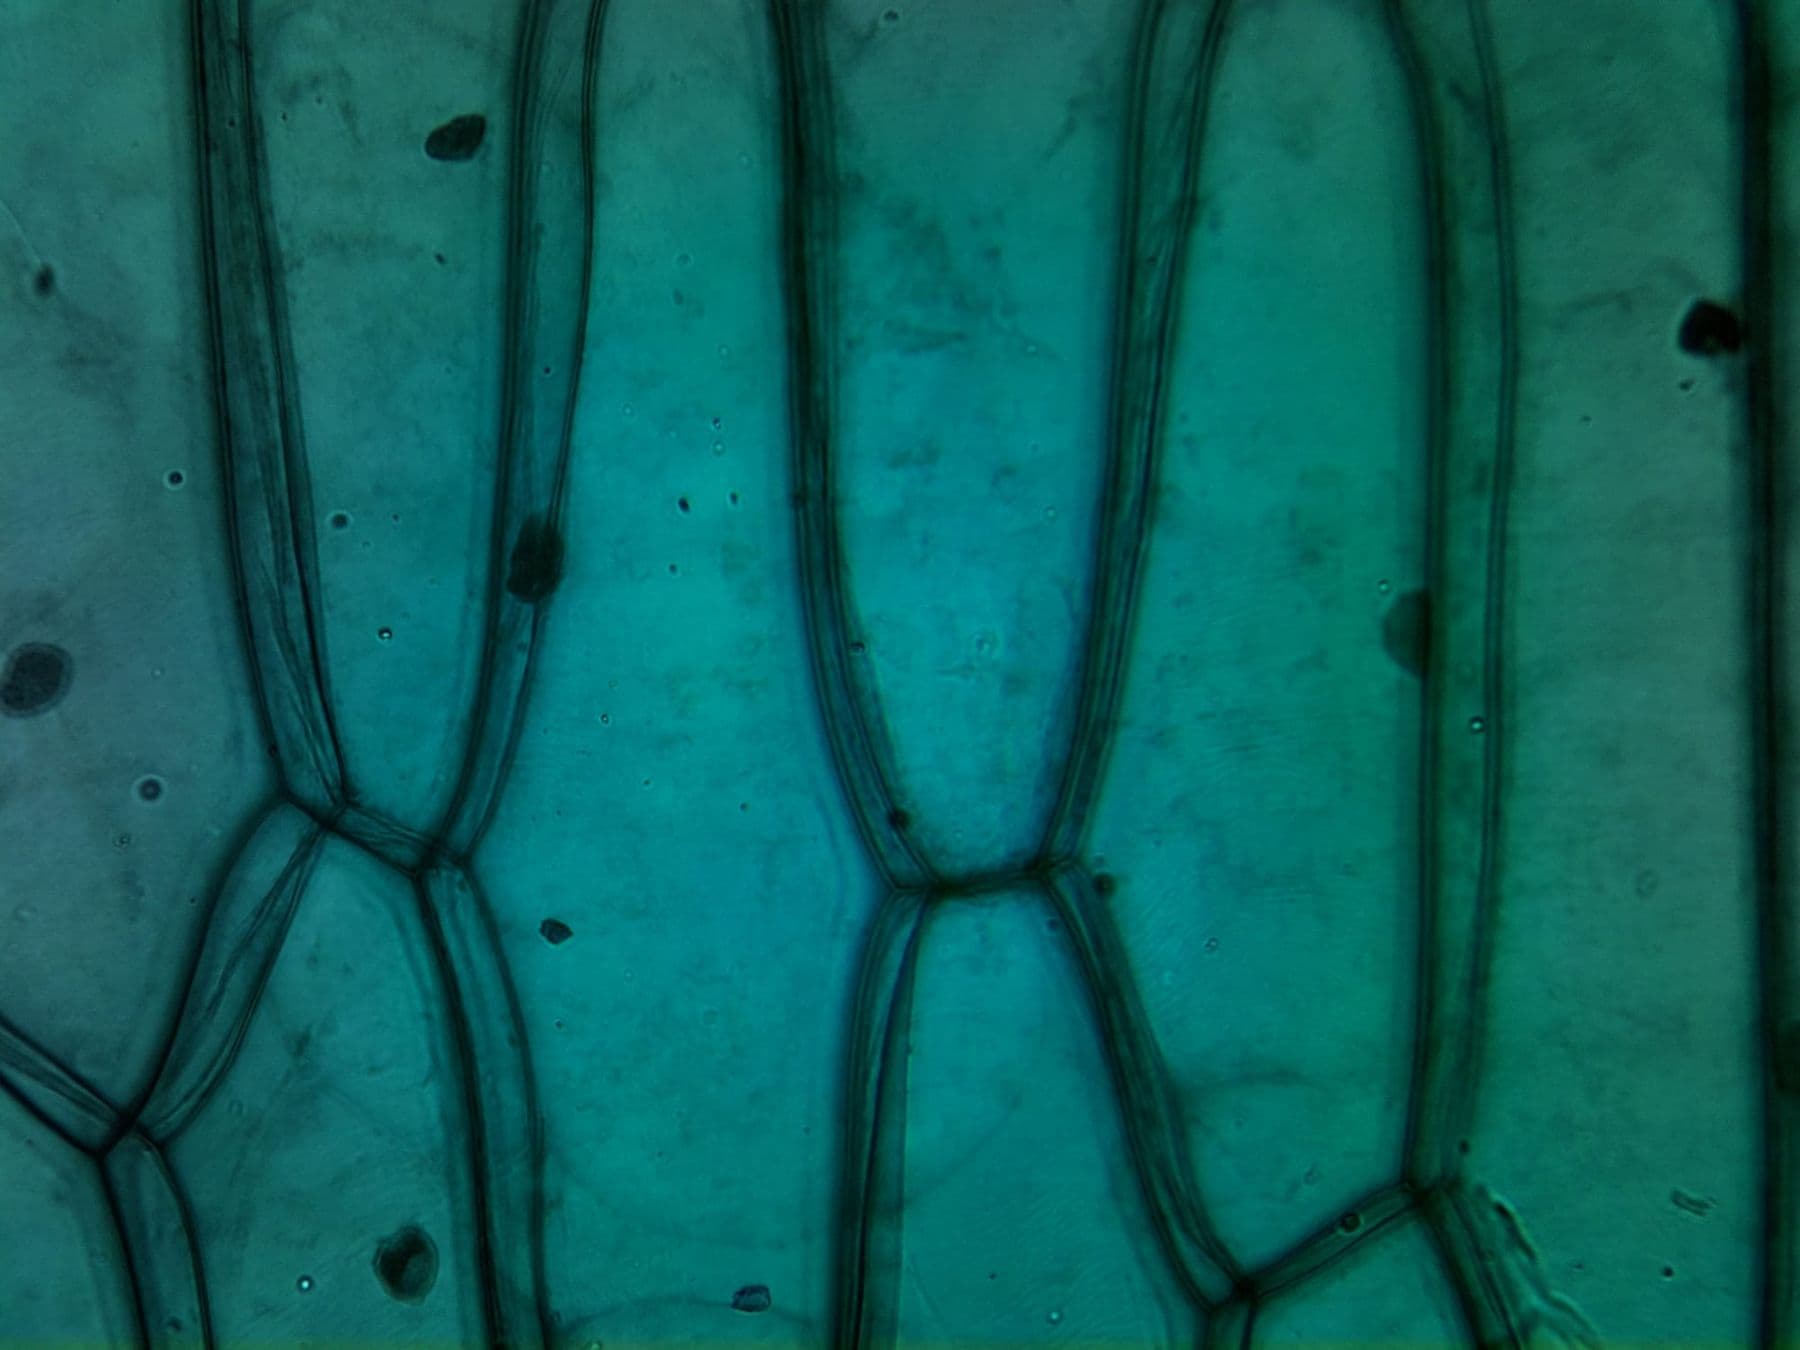
What happens and why: under the microscope the onion skin divides into rectangular cells that look like a brick wall. The lines are cell walls, which give plant cells their firm shape. In some cells the nucleus is visible as a dark dot. A teacher can stain the sample with one drop of iodine solution (for example Lugol’s iodine) so the nuclei stand out.
Safety: only an adult handles iodine solution, as it stains skin and clothes and irritates eyes. Handle the glass carefully: cover slips are very thin and break easily.
Experiment 5: seed germination with a soil sensor
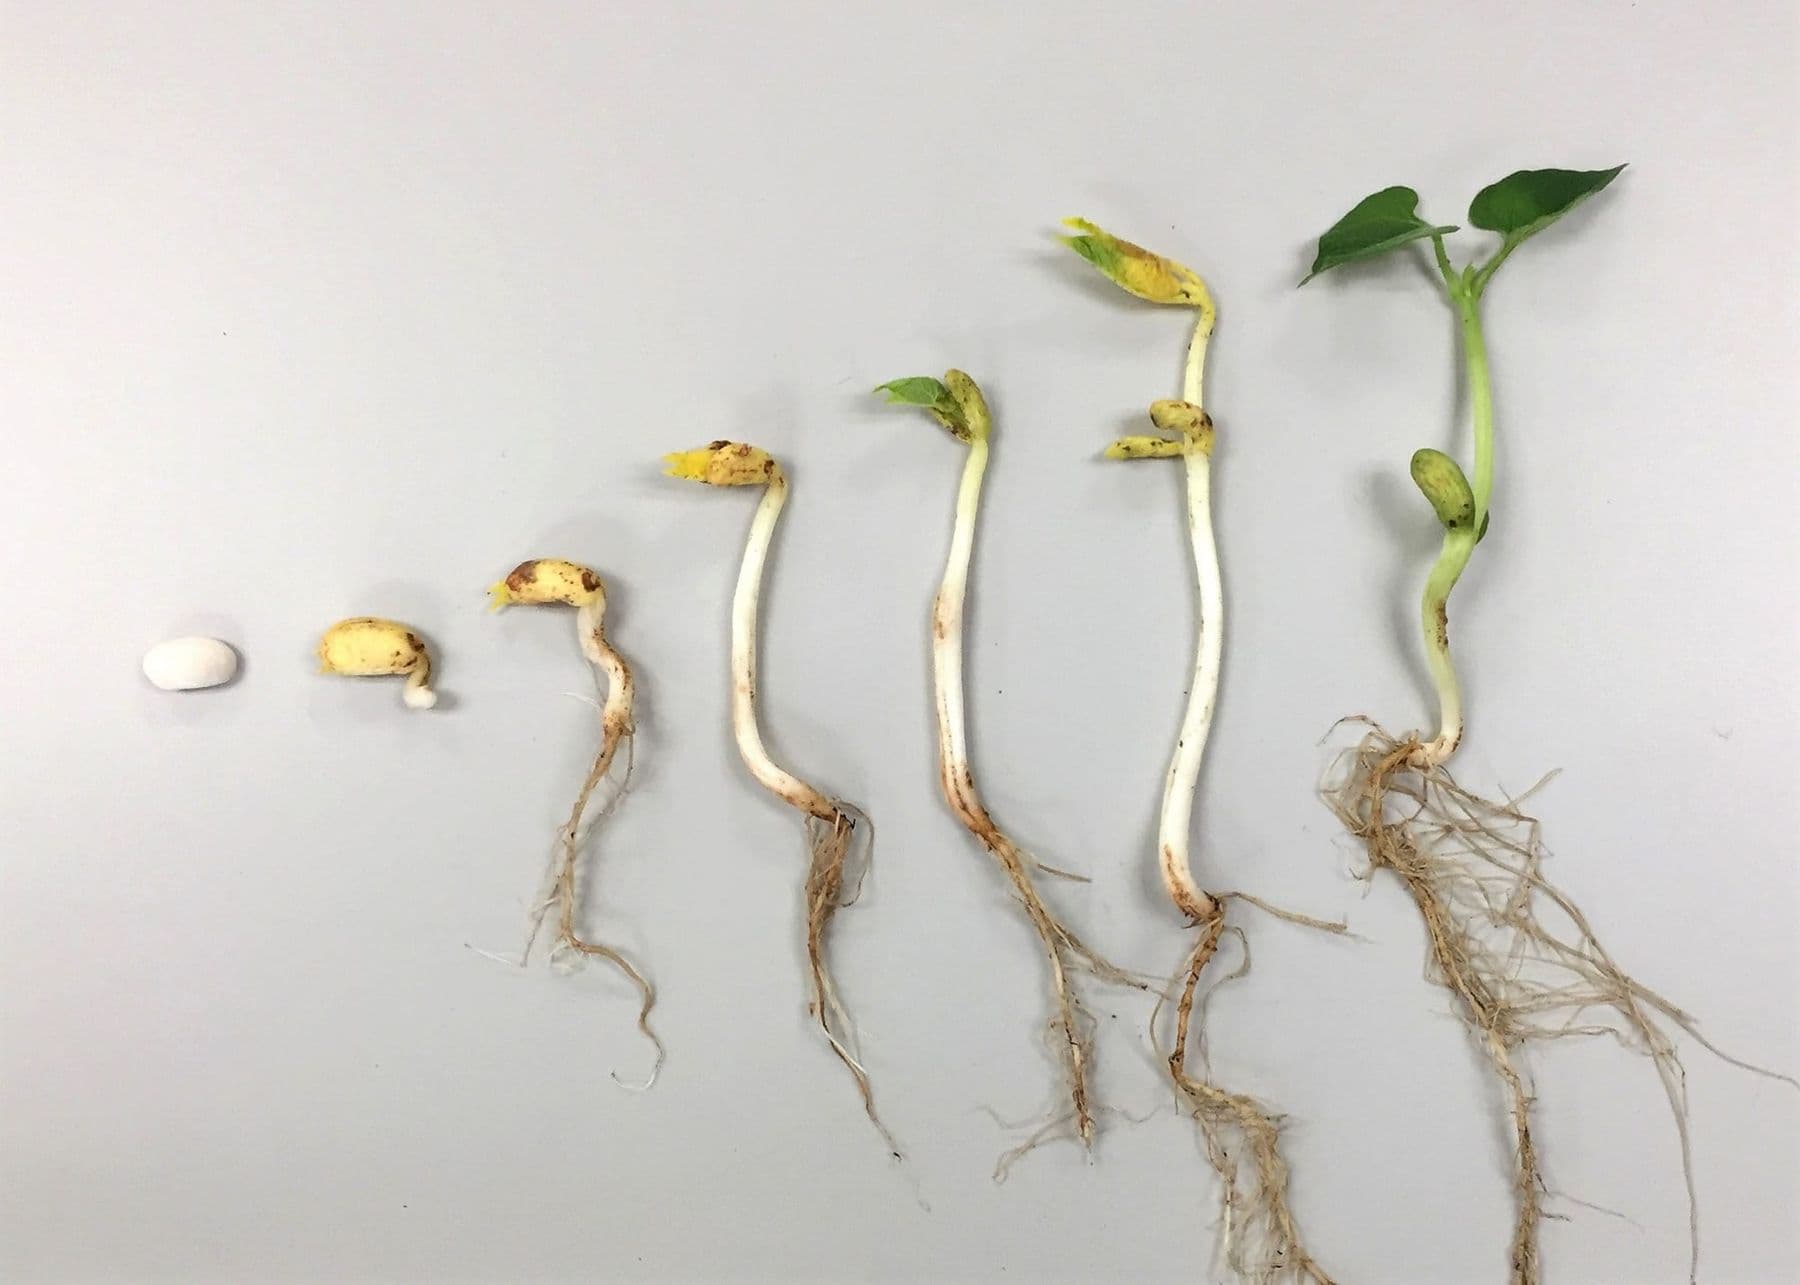
Materials: bean or cress seeds, 3 pots of soil, a ruler, an Arduino, a capacitive soil moisture sensor.
Steps:
- Sow seeds the same way in three pots. Water the first moderately, leave the second dry, and flood the third.
- Calibrate the sensor first: note its reading in air (dry) and in water (wet). Put it into water or soil only up to the marked line; the top part holds the electronics.
- Put the sensor in a pot and log moisture every hour with the Arduino.
- Measure seedling height daily with a ruler and record it in a table.
What happens and why: seeds need water, oxygen and a suitable temperature to germinate. Water activates enzymes that break down the seed’s food store and give the embryo energy to grow. In dry soil the seed does not germinate; in waterlogged soil it lacks oxygen. A capacitive sensor is better than a two-pronged resistive one because its electrodes do not touch the soil directly, so they do not corrode and last longer.
Safety: wash hands after working with soil. The Arduino runs on low-voltage USB power, but keep water off the board.
How to turn a biology experiment into a STEAM project
An experiment becomes a project when students ask a question, measure and analyse the data:
- Maths: leaf disc float time against lamp distance, plotted in Google Sheets.
- Technology: an Arduino seed experiment that logs moisture and lights an LED when the soil is dry.
- Art: an exhibition or poster of cell photos, “What lives in our kitchen”.
- Engineering: a small greenhouse model that runs the seed experiment automatically.
Chemistry experiments that pair well with this series are in chemistry experiments for home and the classroom, and electricity and magnetism in 5 simple physics experiments. For sensor basics see Arduino for beginners, and for planning such projects across a school, STEAM education in schools.
Give every experiment a control group: discs in the dark, an egg in water, a pot with normal watering. Children often think the result is obvious. The control shows what would have happened without our intervention, and that is the core of scientific thinking.
Frequently asked questions
How do you extract DNA at home?
You need strawberries, salt, washing-up liquid and cold alcohol. Mash the strawberries in salty, soapy water, filter, and slowly pour cold alcohol on top. The white strands at the boundary are DNA. Only an adult should handle the alcohol.
Why do leaf discs float in light?
During photosynthesis the leaf releases oxygen, which collects in the spaces inside the leaf and makes the disc lighter. In the dark there is no photosynthesis, so the discs stay at the bottom.
Which alcohol should I use for DNA extraction?
Isopropyl or ethyl alcohol at 70–96%, such as pharmacy surgical spirit. The colder it is, the better the DNA comes out, so keep it in the freezer beforehand in a closed bottle. Alcohol is flammable: work well away from any flame.
Can you do biology experiments without a microscope?
Yes. DNA extraction, leaf discs, osmosis and seed germination need no microscope. To see cells, a simple school microscope and a phone camera are enough.
What age are these experiments for?
Osmosis, seed germination and the microscope work from 8–9. DNA extraction and leaf discs make more sense from 10–11, when students learn about cell structure and photosynthesis.
Your next step
If the seed experiment sparks an interest in sensors and building smart devices, the Electronics and Smart Devices course in Tbilisi teaches students aged 10–13 Arduino, sensors and coding, with a new project every week.
Sources
- How to Extract DNA from Anything Living, Genetic Science Learning Center, University of Utah
- Investigating factors affecting the rate of photosynthesis, Royal Society of Biology
- Investigating osmosis in chickens’ eggs, Royal Society of Biology
- Osmosis in chipped potatoes, Royal Society of Biology
- Capacitive Soil Moisture Sensor SEN0193, DFRobot Wiki
- Science at Home: Photosynthesis (floating leaf disks), University of Arizona MCB
- Origin and evolution of the octoploid strawberry genome (Edger et al., 2019), Nature Genetics / PMC
- Safety and School Science Instruction, NSTA