















Physics experiments at home and in class can be done with cheap materials. Five simple experiments cover three core topics: a lemon battery and an electromagnet (electricity), a homopolar motor (magnetism), and a pendulum and an egg drop (motion). In each one, students measure, record results in a table and compare them with what the formula predicts.
Physics is often seen as a subject of formulas. A good experiment brings the formula to life: when a child lights an LED with lemons, or sees that a pendulum’s period does not depend on the mass of the weight, they connect the textbook to their own experience.
Each experiment has materials, steps, a measurement table, the physics, and safety rules. At the end you will find how to extend the experiments with Arduino.
Which physics experiment teaches what?
| Experiment | Topic | What we measure | Age |
|---|---|---|---|
| Lemon battery | Electricity, chemical energy | Voltage (volts) | 9+ |
| Electromagnet | Electricity and magnetism | Paper clips lifted | 9+ |
| Homopolar motor | Force on a current in a magnetic field | Direction of rotation | 11+ |
| Pendulum | Oscillation, gravity | Period (seconds) | 10+ |
| Egg drop | Motion, impact | Height, outcome | 8+ |
Run every experiment with adult supervision. Use only ordinary alkaline batteries (AA or 9 V). Never connect wires to a mains socket, a car battery or a lithium battery. A short-circuited wire and battery get hot, so close the circuit for a few seconds only. Keep neodymium magnets away from young children: two swallowed magnets attract each other inside the body, which is life-threatening.
Experiment 1: the lemon battery
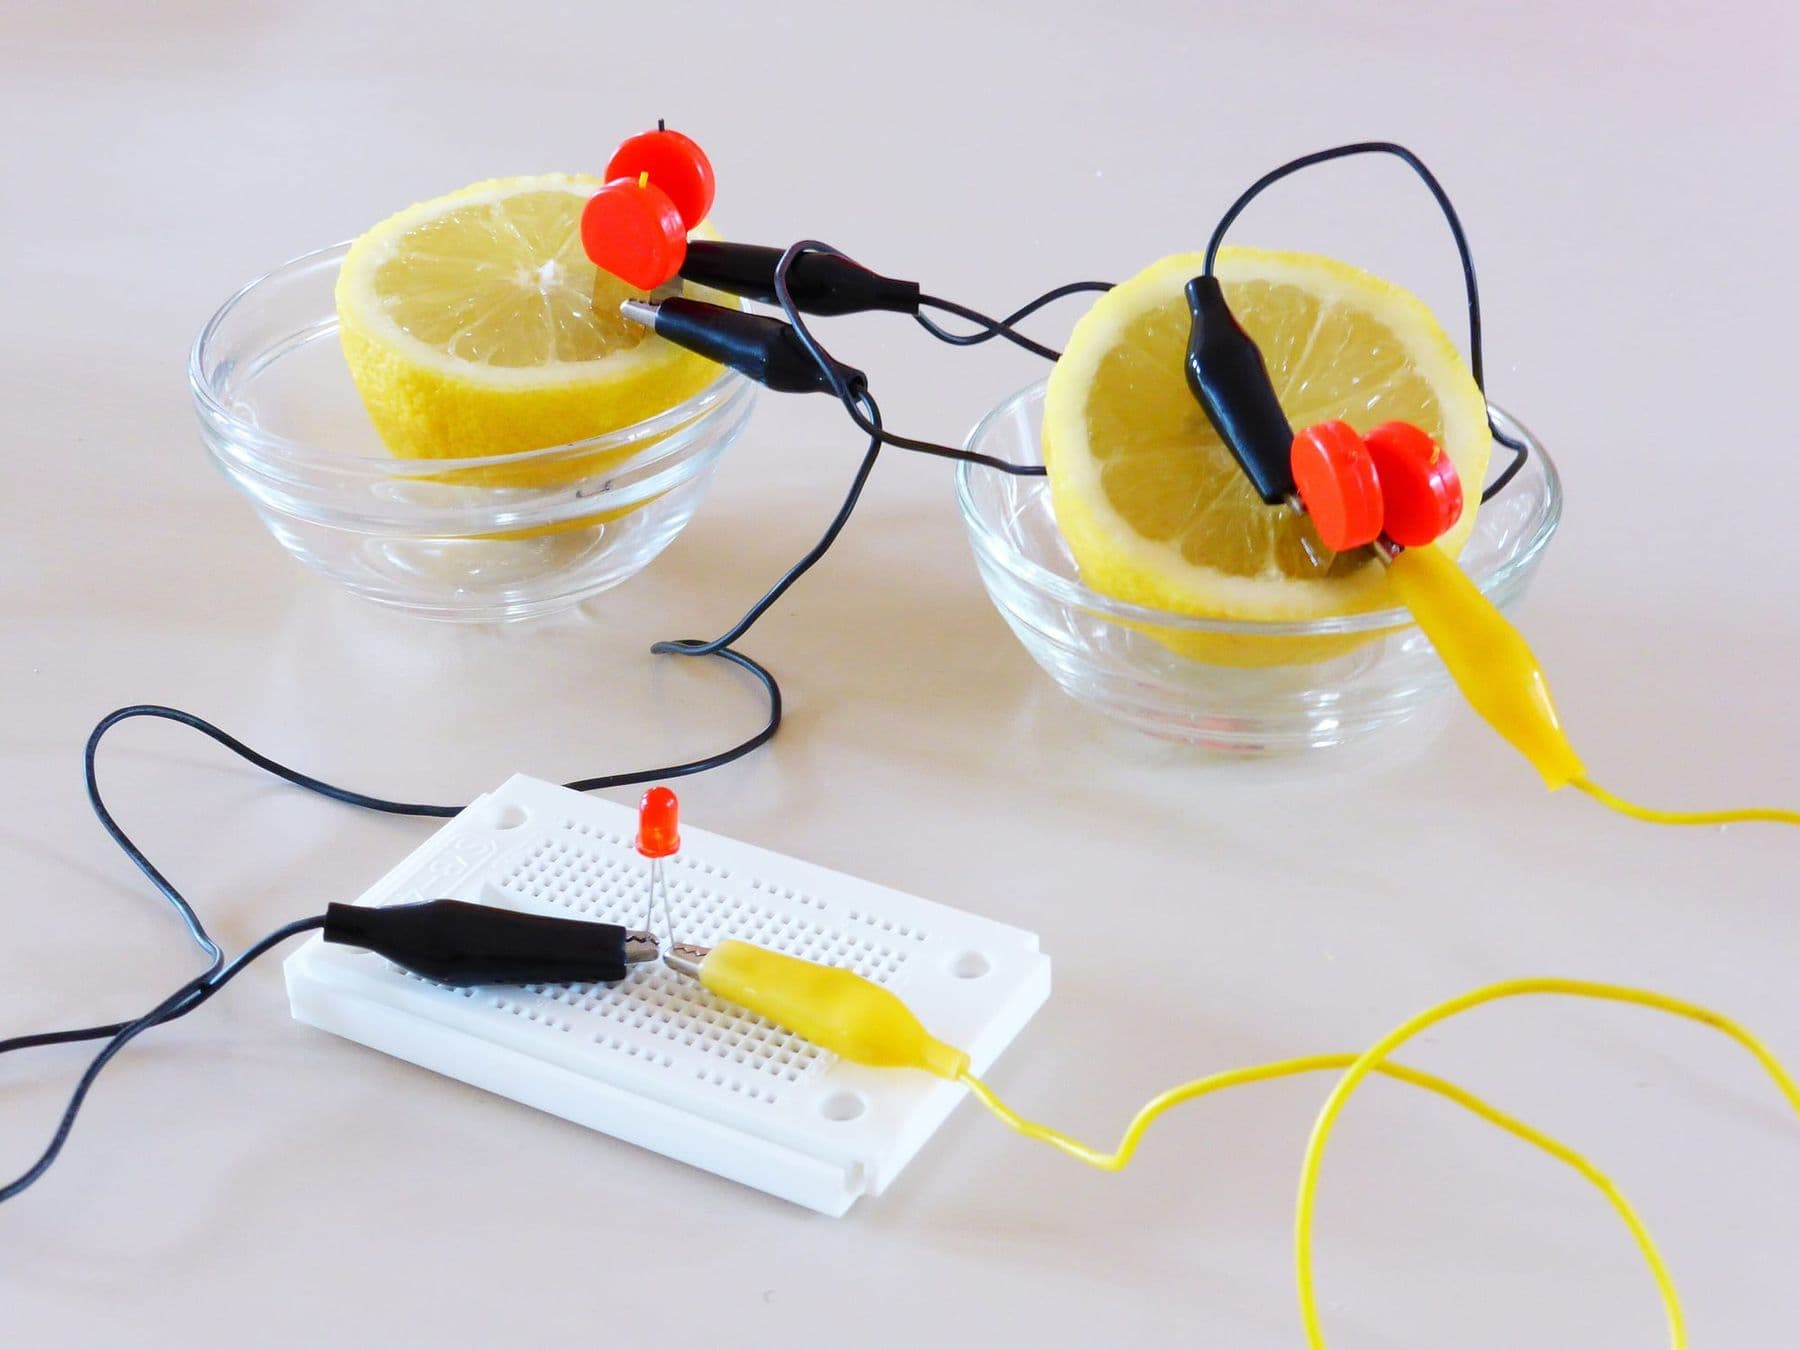
Materials: 3–4 lemons, the same number of galvanised (zinc-coated) nails, pieces of copper wire or strip, crocodile-clip leads, a multimeter, a red LED.
Steps:
- Roll the lemons on the table to release the juice inside.
- Push a nail and a piece of copper into each lemon, 2–3 cm apart, so they do not touch.
- Measure the voltage of one lemon with the multimeter.
- Connect the lemons in series: copper of the first to the nail of the second, and so on. Measure the voltage after adding each lemon.
- Finally connect the LED: the long leg (anode) to the free copper electrode, the short leg to the free nail. Watch in a darkened room.
| Number of lemons | Expected voltage | LED |
|---|---|---|
| 1 | about 0.9 V | Off |
| 2 | about 1.8 V | May barely glow |
| 3 | about 2.7 V | Faint glow |
| 4 | about 3.6 V | More visible |
What happens and why: this is a galvanic cell. Zinc is oxidised in the acidic juice: it goes into solution as ions and leaves electrons behind in the metal. They flow through the wire to the copper, where hydrogen ions pick them up and bubble off as hydrogen gas. The energy comes from the chemical change of the zinc, not from the lemon itself. One lemon gives about 0.9 volts and a tiny current, up to about 1 milliamp. That is why an LED needs several lemons in series, and why running a bulb or a phone on lemons is practically impossible.
Safety: do not eat the lemons afterwards; they contain metal ions. Handle the nails carefully.
What voltage, current and resistance mean and how they relate is explained simply in electronics for beginners: voltage, current, resistance and Ohm’s law. The lemon battery is a chemistry experiment too: see more in chemistry experiments for home and the classroom.
Experiment 2: a homemade electromagnet
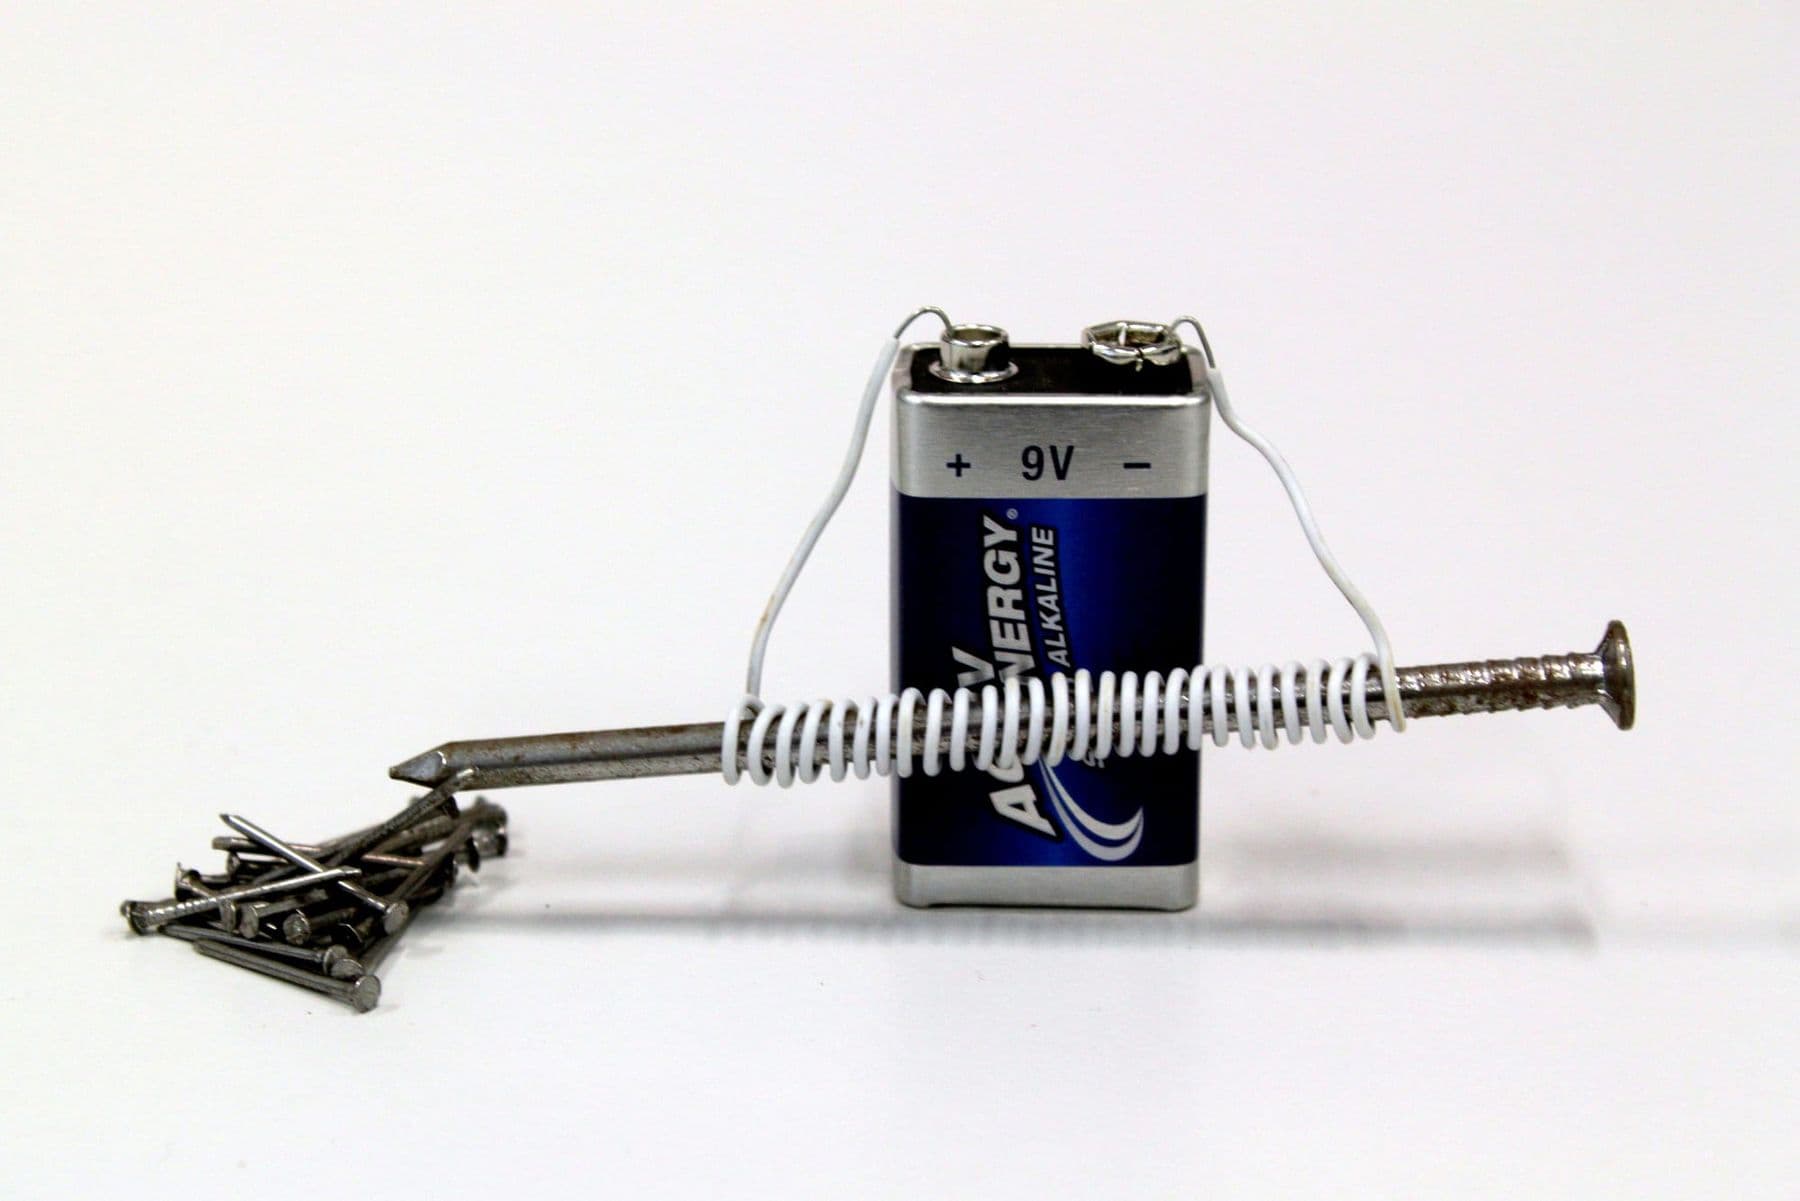
Materials: a large iron nail (8–10 cm), 1–2 metres of thin insulated copper wire, a 1.5 V AA or a 9 V battery, electrical tape, paper clips.
Steps:
- Strip 2 cm of insulation from both wire ends (sand the ends of enamelled wire).
- Wind 20 turns tightly around the nail, all in one direction.
- Touch the wire ends to the battery terminals and pick up paper clips with the tip of the nail. Count how many it lifts.
- Disconnect, then repeat with 40 and 60 turns.
| Turns | Clips lifted (try 1) | Try 2 | Average |
|---|---|---|---|
| 20 | |||
| 40 | |||
| 60 |
What happens and why: in 1820 Hans Christian Ørsted discovered that an electric current creates a magnetic field around it. In a coil the field concentrates in the centre, and an iron core strengthens it many times, because the magnetic domains (tiny magnetic regions) in the iron line up with the field. The field is roughly proportional to the number of turns times the current: more turns or more current, a stronger magnet. Switch the current off and the field disappears (the iron may stay slightly magnetised). That is an electromagnet’s advantage over a permanent magnet.
Safety: this circuit is close to a short circuit, so the wire and battery heat up quickly. Do not keep it closed for more than 5–10 seconds, do not touch a hot wire, and disconnect the wire from the battery afterwards.
Experiment 3: a homopolar motor
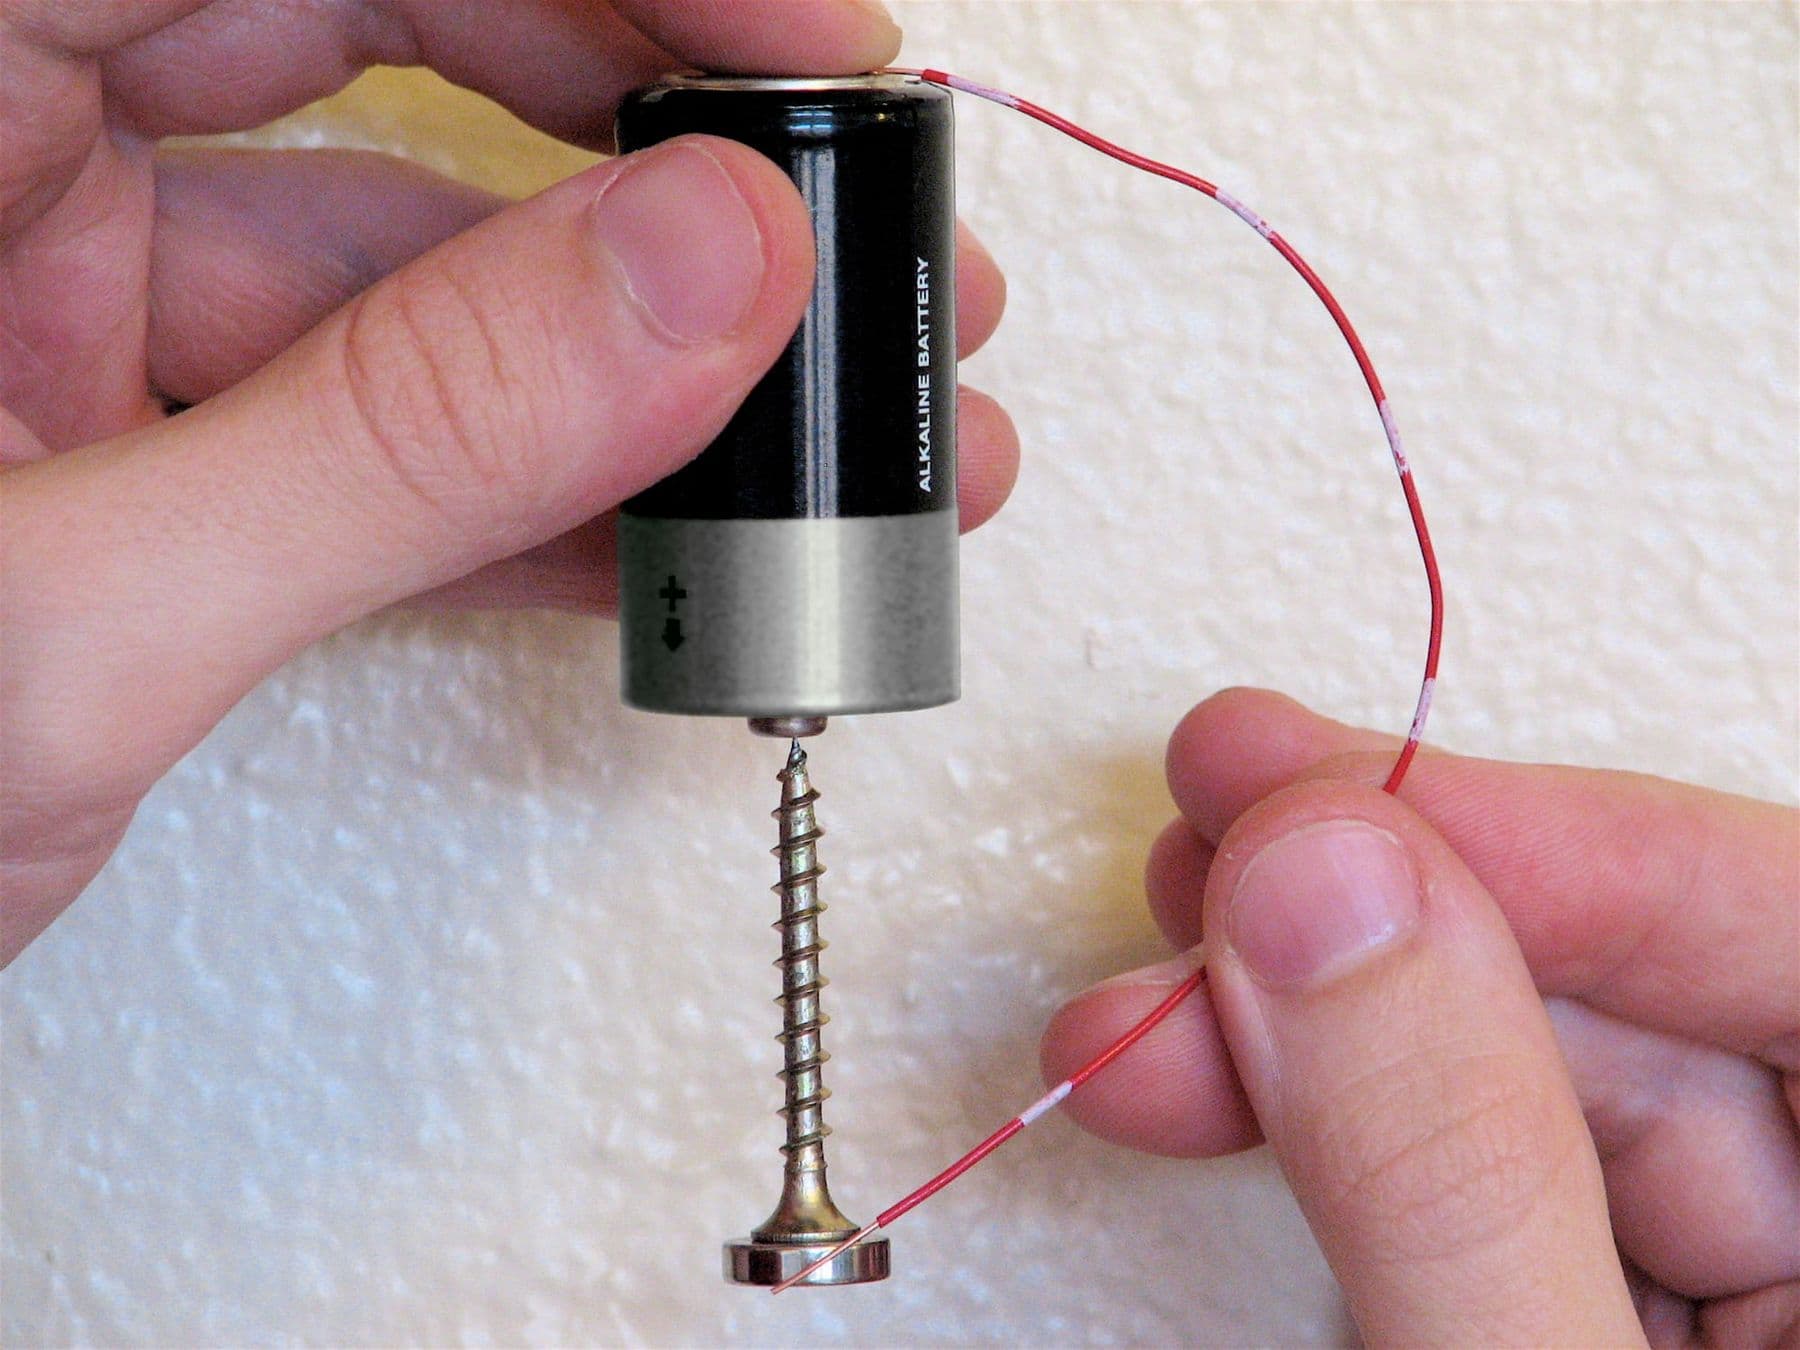
This is one of the simplest electric motors there is: just four parts. Michael Faraday demonstrated the first device working on this principle in 1821.
Materials: a 1.5 V AA alkaline battery, a small neodymium disc magnet (slightly wider than the screw head), a steel screw, 15–20 cm of copper wire with bare ends.
Steps:
- Stick the magnet to the screw head and touch the screw tip to one terminal of the battery: the magnet holds the screw in place.
- Hold one end of the wire against the other battery terminal.
- Lightly touch the other end of the wire to the side of the magnet: the screw and magnet start spinning fast.
- Flip the magnet over and see how the direction changes.
What happens and why: current flows round a closed loop: battery, screw, magnet, wire and back to the battery. Inside the magnet it flows along the radius, from the centre to the edge. A current-carrying conductor in a magnetic field feels a force (the Lorentz force on the moving charges) perpendicular to both the current and the field. That force spins the magnet and the screw. Flip the magnet or the battery and the force reverses.
Safety: this is a short circuit, so the wire and battery heat up quickly; close the circuit for a few seconds only and do not touch a hot wire. Neodymium magnets are very strong: they snap together, pinch fingers and can shatter. If a child swallows two or more magnets, they attract each other inside the body: this is an emergency, so get medical help at once. Store magnets in a closed box, away from young children.
Experiment 4: a pendulum and a phone stopwatch
Materials: string, a small weight (a nut or a few washers), tape, a ruler, a phone stopwatch.
Steps:
- Tie the weight to the string and tape the string to the edge of a table.
- Measure the length from the attachment point to the centre of the weight.
- Pull the weight aside by a small angle (no more than 15–20°) and let go.
- Time 10 full swings and divide by 10. That gives the period of one swing.
- Repeat for 25, 50, 75 and 100 cm, then with the same length but a weight of twice the mass.
| String length | Period from formula | Measured period |
|---|---|---|
| 25 cm | 1.00 s | |
| 50 cm | 1.42 s | |
| 75 cm | 1.74 s | |
| 100 cm | 2.01 s |
What happens and why: for small swings, a pendulum’s period is T = 2π√(L/g), where L is the length and g is the acceleration due to gravity, about 9.8 m/s². Mass is not in the formula: a weight of twice the mass swings with the same period, something Galileo noticed in the early 1600s. Quadrupling the length doubles the period. At large angles the formula is less accurate: at about 23° the error is already 1%.
Extension: calculate g = 4π²L/T² from your measured period. The free phyphox app, developed at RWTH Aachen University, lets you measure with your phone’s sensors.
Experiment 5: the egg drop
Materials: raw eggs, straws, paper, tape, cotton wool, balloons, a plastic bag (for a parachute), a tape measure.
Steps:
- Give each team the same limited materials and 30 minutes.
- Each team builds a “package” to protect the egg from breaking.
- Drop it from 1 metre, then from 2 metres. Only an adult goes up high, on a stable ladder.
- Record the result and what made the most successful design work.
| Height | Speed at the ground (no air) |
|---|---|
| 1 m | about 4.4 m/s |
| 2 m | about 6.3 m/s |
| 3 m | about 7.7 m/s |
What happens and why: as it falls, the egg speeds up; ignoring air resistance, its speed at the ground is v = √(2gh). On impact the egg loses that speed very quickly. The shorter the stopping time, the larger the impact force. A good package lengthens the stopping time (cotton, straws and balloons squash slowly) and spreads the force. A parachute lowers the speed through air resistance. Car airbags and crumple zones work the same way.
Safety: never drop from a balcony or a window. Nobody stands below. Wash hands after handling raw eggs.
How to extend the experiments with Arduino
A physics experiment becomes a project when measurement gets automatic and precise:
- Lemon battery: measure the voltage with an Arduino analogue input and see how it drops over time. Never feed more than 5 volts into an Arduino pin (or more than 3.3 volts on 3.3 V boards such as the ESP32).
- Pendulum: turn an LED and a light-dependent resistor (LDR), or better an infrared break-beam sensor, into a light gate: the pendulum breaks the beam and the Arduino times the period far more precisely than a stopwatch.
- Egg drop: an accelerometer inside the package records the g-force the “egg” felt on impact.
- Electromagnet: an Arduino and a transistor switch the electromagnet on and off, for example in a small crane. Always put a protection (flyback) diode across the coil: when switched off, the coil produces a voltage spike that damages the transistor.
Building your first circuit on a breadboard is covered step by step in your first electronic circuit: light an LED on a breadboard, and family project ideas with motors and sensors in 10 robotics projects to build with your kids at home. For similar biology experiments, see 5 fun biology experiments.
Repeat every measurement three times and take the average. Children are often surprised that the same experiment gives slightly different results. It is a great chance to explain measurement error and why scientists trust an average, not a single number.
Frequently asked questions
How many volts does a lemon battery make?
With zinc and copper electrodes, one lemon gives about 0.9 volts and up to about 1 milliamp. To light an LED, connect 3–4 lemons in series.
Why won’t my lemon battery light an LED?
The usual reasons: too few lemons (one lemon’s voltage is not enough), the LED is the wrong way round, or the electrodes are touching. Check the voltage with a multimeter, flip the LED, and work in a darkened room, since the light is faint.
How do you make an electromagnet stronger?
Add more turns, use an iron core, and use a battery that delivers more current. The field is roughly proportional to turns times current. But more current heats the wire more, so close the circuit only briefly.
Why does a homopolar motor spin?
A current-carrying conductor in a magnetic field feels a force (the Lorentz force), perpendicular to both the current and the field. It turns the magnet or the wire. The direction depends on the magnet’s poles and the direction of the current.
Which physics experiments are safe for kids?
The egg drop works from age 8 and the pendulum from 10. The lemon battery and electromagnet are safe with ordinary batteries and adult supervision. The homopolar motor is for older children because of the strong magnet and the short circuit.
Your next step
If the lemon battery and electromagnet got your child hooked on electricity, the Electronics and Smart Devices course in Tbilisi teaches students aged 10–13 current, voltage, Ohm’s law, sensors and Arduino coding. The electronics kit is included and stays with the student, so the experiments can continue at home. Teens aged 13–17 have a deeper level: both courses are on our electronics and Arduino courses page.
Sources
- Lemon battery, Wikipedia
- Electromagnet, Wikipedia
- Homopolar motor, Wikipedia
- Pendulum, Wikipedia
- phyphox: physical phone experiments, RWTH Aachen University
- Magnets, U.S. Consumer Product Safety Commission
- Safety and School Science Instruction, NSTA